#Android Nougat Update
Explore tagged Tumblr posts
Visit Tumblr Blog
Explore Tumblr blogs with no restrictions, modern design and the best experience.
Last Seen Tumblr Blogs


Fun Fact
The average Tumblr user visits about 67 pages every month.
Text
The tips to update Nougat for Hisense T5 Plus: Detailed instructions!
## The tips to update Nougat for Hisense T5 Plus: Detailed instructions! Do you own the Hisense T5 Plus and want to experience the smooth, full -feature Android Nougat operating system? This article will guide you step by step how to install the official nougat firmware for your device safely and effectively. Be ready and start together! I. Preparation before installation: Before the update, you…
0 notes
Text
How to Use www.aka.ms/linkpc to Connect Your Phone to a PC
With the increasing need for seamless connectivity between devices, Microsoft has introduced www.aka.ms/linkpc, a simple yet powerful way to link your smartphone to your Windows PC. Whether you want to sync notifications, transfer files, or even make calls from your computer, this feature enhances productivity by creating a unified experience across devices.
This article will cover the following:
What www.aka.ms/linkpc is
Benefits of linking your phone to your PC
System requirements
Step-by-step guide to setting up the connection
Common troubleshooting tips
Advanced features you can use once connected

What is www.aka.ms/linkpc?
www.aka.ms/linkpc is a short URL provided by Microsoft that redirects users to the setup page for connecting their Android phone or iPhone to a Windows PC. This connection is made possible through the Phone Link app (previously known as Your Phone Companion).
The feature enables users to:
View and reply to SMS messages
Access phone notifications
Transfer photos and files between devices
Mirror the phone screen onto the PC
Make and receive calls from the PC
Use Android apps directly from Windows (for selected Samsung and Surface devices)
This integration creates a seamless experience for users who frequently switch between their smartphones and PCs, improving efficiency and accessibility.
Benefits of Using www.aka.ms/linkpc
Connecting your smartphone to your PC via www.aka.ms/linkpc provides multiple advantages, including:
1. Seamless File Sharing
Transferring files between your phone and PC is as simple as dragging and dropping. This eliminates the need for cables, USB drives, or third-party apps.
2. Instant Notifications
Once connected, your PC will display all phone notifications, ensuring you never miss important alerts even when your phone is not nearby.
3. Messaging from Your PC
You can send and receive SMS messages directly from your computer, making typing easier with a full keyboard.
4. Screen Mirroring
For select devices, the feature allows you to mirror your phone screen onto your PC, enabling you to interact with mobile apps using a keyboard and mouse.
5. Call Management
You can make and receive phone calls directly from your PC, reducing the need to switch devices frequently.
6. Better Productivity
With your phone connected, you can work without interruptions, keeping all your necessary communications in one place.
System Requirements for www.aka.ms/linkpc
To use www.aka.ms/linkpc, ensure your devices meet the following requirements:
For Windows PC
Windows 10 (October 2018 update or later) or Windows 11
Bluetooth support (for call features)
Internet connection
For Android Phones
Android 7.0 (Nougat) or later
The Link to Windows app installed from the Google Play Store (pre-installed on some Samsung and Surface devices)
For iPhones (Limited Features Available)
iOS 14 or later
The Phone Link app installed on Windows 11 (only supports messaging and notifications)
How to Set Up www.aka.ms/linkpc
Follow these steps to successfully connect your phone to your Windows PC:
Step 1: Open the Link on Your PC
Open a web browser on your Windows PC.
Type www.aka.ms/linkpc in the address bar and press Enter.
The page will redirect you to the Phone Link app. If it’s not installed, you’ll be prompted to download it.
Step 2: Install the App on Your Phone
On your Android device, go to the Google Play Store.
Search for Link to Windows and install the app.
Open the app and sign in with your Microsoft account (use the same one as on your PC).
Step 3: Connect Your Devices
On your PC, open the Phone Link app.
Click Get Started and select Android or iPhone based on your device.
Follow the on-screen instructions to scan the QR code displayed on your PC using your phone’s Link to Windows app.
Step 4: Grant Permissions
For the connection to work properly, allow the following permissions on your phone:
Notification Access (to sync notifications)
Contacts & Messages Access (to enable calling and messaging)
Storage Access (to transfer files)
Step 5: Complete the Setup
Once permissions are granted, tap Done on your phone.
Your PC will confirm the connection, and your phone’s notifications, messages, and other features will start syncing.
Common Troubleshooting Tips
If you encounter issues while setting up www.aka.ms/linkpc, try the following fixes:
1. Ensure Both Devices Are Connected to the Internet
A stable internet connection is required for syncing. Check your Wi-Fi or mobile data.
2. Restart Both Devices
Restarting your PC and phone can resolve connectivity issues.
3. Update the Apps and System Software
Ensure your Phone Link and Link to Windows apps are updated. Also, keep your Windows and Android OS up to date.
4. Check Bluetooth and Permissions
For calling features, ensure Bluetooth is enabled and the necessary permissions are granted.
5. Reset the Connection
If issues persist, unlink your phone from the Phone Link app and restart the setup process.
Advanced Features of Phone Link
Once your phone is connected to your PC via www.aka.ms/linkpc, you can access several advanced features:
1. Access Android Apps on PC
For select Samsung and Surface devices, you can launch Android apps directly from Windows and use them as if they were installed on your PC.
2. Drag-and-Drop File Transfers
Easily move photos, documents, and other files between devices without using third-party apps.
3. Clipboard Sync
Copy text on your phone and paste it on your PC (and vice versa).
4. Personalized Notifications
Choose which notifications appear on your PC to reduce distractions.
5. Call History & Contacts Integration
View recent call logs and manage contacts directly from the Phone Link app.
0 notes
Text
Sync Android Phone with Windows PC: Step-by-Step Guide
Keeping your Android phone and Windows PC connected has never been easier, thanks to Microsoft Phone Link. This tool allows seamless syncing of notifications, messages, photos, and more between your devices. Follow this simple step-by-step guide to set up and use Microsoft Phone Link to streamline your workflow and stay connected across devices.
Step 1: Check Compatibility
Before starting, ensure your Android phone and Windows PC are compatible. Your PC should be running Windows 10 or later, and your phone should have Android 7.0 (Nougat) or newer.
Step 2: Install the Apps
On your Android phone, download the "Link to Windows" app from the Google Play Store.
On your PC, open the Microsoft Store and search for the "Phone Link" app (formerly known as Your Phone).
Step 3: Connect Your Devices
Open the Phone Link app on your PC and sign in with your Microsoft account.
Launch the Link to Windows app on your Android phone and sign in using the same Microsoft account.
Use the app to scan the QR code displayed on your PC screen or follow the on-screen instructions to link your devices.
Step 4: Grant Permissions
For seamless syncing, grant the necessary permissions on your Android phone. These may include access to notifications, messages, and media files. You’ll also need to allow the app to run in the background to ensure uninterrupted connectivity.
Step 5: Explore Features
Once linked, explore the features of Microsoft Phone Link:
Notifications: View and respond to phone notifications directly on your PC.
Messages: Send and receive text messages from your PC.
Photos: Access and transfer photos between your phone and PC.
Calls: Make and receive calls on your PC using your phone’s connection.
Step 6: Customize Settings
Adjust the app’s settings to suit your preferences. For example, you can choose which apps send notifications to your PC or set up quick access for frequently used features.
Troubleshooting Tips
Ensure both devices are connected to the same Wi-Fi network for optimal performance.
Restart the apps or devices if the connection is unstable.
Update the apps and operating systems to the latest versions for compatibility.
Conclusion
Microsoft Phone Link bridges the gap between your Android phone and Windows PC, offering a unified experience across devices. By following this step-by-step guide, you can enhance productivity and enjoy the convenience of managing your phone from your PC. Syncing has never been this simple!
0 notes
Text
### The Fake S24 Ultra: Surprisingly Good, But Still FakeSamsung works hard, but fake phone companies work harder. This is the tale of a brand new fake S24 Ultra, a one-to-one copy that aims to mimic Samsung’s latest flagship device. In the past, these counterfeit phones have often surprised me with their quality and detail. In this video, we delve into a detailed side-by-side unboxing and comparison between the real S24 Ultra and its fake counterpart, exploring just how far the makers of the fake device went in replicating Samsung's new AI features.#### Unboxing: Real vs. FakeBefore even opening the boxes, a noticeable difference is evident: the fake phone box has a slightly grayer hue compared to the deep black of the real one. The text on the fake box is bolder and brighter, and while the real box lists IMEI 1 and IMEI 2, the fake one merely shows "II." Interestingly, the IMEI numbers on the fake box do correspond to a real Samsung Galaxy S24 Ultra, making it harder to distinguish based on this detail alone.Turning the boxes over, further discrepancies emerge. The fake box has some text along the seal that reads, "Do not accept if seal is broken," a detail absent from the real box. Additionally, the fake box features some amusing spelling mistakes, a hallmark of counterfeit products.One interesting test is weighing the boxes. Surprisingly, both the real and fake boxes weigh almost the same, indicating the counterfeiters put significant effort into replicating the real product's feel.#### Inside the BoxesUpon unboxing, the differences become clearer. The real S24 Ultra uses paper for its protective layers, which can be easily ripped, while the fake uses plastic. Both phones look strikingly similar at first glance, but a closer inspection reveals a bubble on the back glass of the fake phone, indicating it hasn’t been properly adhered and is slightly lifting.Examining the contents of the boxes, the fake phone includes a USB-A to USB-C cable, whereas the real one comes with a USB-C to USB-C cable. The SIM ejector pins are slightly different, but this is a minor and hard-to-detect difference. The start guides also differ, but these can vary by region, making them unreliable for authentication.#### The Phones: Side-by-SideTurning on both phones reveals that the fake one uses an LCD screen, while the real S24 Ultra boasts one of the best displays on the market. The bezels on the fake phone are surprisingly similar to the real one, except for the larger bottom chin. The fake phone even copies the boot screen almost exactly, but there are subtle differences.Upon navigating to the settings, the fake phone claims to run Android 14, but clicking a few times reveals it’s actually running Android 7 (Nougat). The real S24 Ultra, of course, displays the proper Android 14 interface.Interestingly, the fake phone offers software updates, albeit very small ones. This is odd, considering it's a device designed to scam people, yet it still receives updates past its initial sale.#### Camera and AI FeaturesOne of the main selling points of the S24 Ultra is its AI features, particularly in the camera. The fake phone’s camera setup appears convincing at first glance. However, by applying pressure with a spudger, it's evident that most of the lenses are fake, made of plastic, with only the main lens being glass.Testing the cameras and microphones reveals the stark contrast between the two devices. The real S24 Ultra produces clear, high-quality images and sound, while the fake phone's performance is notably poor. Furthermore, the fake phone lacks Samsung’s new AI features. For example, Samsung’s real S24 Ultra can use Google Lens for image search, but the fake one cannot replicate this feature.#### Internal InspectionOpening up the fake S24 Ultra reveals its true nature. The camera lenses are merely decorative, attached to a plastic bracket. The internal components, including the CPU and GPU, are far inferior to the real device. The fake phone uses a
MediaTek 6580 CPU and Mali-400 MP GPU, both significantly outdated compared to the Snapdragon 8 Gen 3 found in the real S24 Ultra.The internal layout of the fake phone is also poorly designed. The main board is held down by screws that put pressure on it, a major design flaw. The battery is a 4500mAh unit, and the sub-board includes the SIM slot and charging port, labeled “SUB” (not to be confused with a plea to subscribe to a YouTube channel).#### ConclusionWhile the fake S24 Ultra is impressive in its attempt to mimic the real device, it falls short in critical areas such as build quality, screen performance, and internal components. The lack of genuine AI features and poor camera performance further highlight its deficiencies.This comparison serves as a cautionary tale: always verify the authenticity of a smartphone before purchasing, especially if the deal seems too good to be true. Counterfeit phones might look convincing, but their performance and reliability are nowhere near the level of genuine devices. Use this guide as a reference to avoid getting scammed and ensure you're investing in a legitimate, high-quality product.
0 notes
Text
Google has announced that it will no longer support older versions of Android and Wear OS on its Google Wallet platform. Users will need to update to the latest operating systems in order to continue using the popular digital payment service. This move aims to improve security and user experience on the platform. Click to Claim Latest Airdrop for FREE Claim in 15 seconds Scroll Down to End of This Post const downloadBtn = document.getElementById('download-btn'); const timerBtn = document.getElementById('timer-btn'); const downloadLinkBtn = document.getElementById('download-link-btn'); downloadBtn.addEventListener('click', () => downloadBtn.style.display = 'none'; timerBtn.style.display = 'block'; let timeLeft = 15; const timerInterval = setInterval(() => if (timeLeft === 0) clearInterval(timerInterval); timerBtn.style.display = 'none'; downloadLinkBtn.style.display = 'inline-block'; // Add your download functionality here console.log('Download started!'); else timerBtn.textContent = `Claim in $timeLeft seconds`; timeLeft--; , 1000); ); Win Up To 93% Of Your Trades With The World's #1 Most Profitable Trading Indicators [ad_1] Google will soon require Android 9 or higher for Google Wallet on Android devices and Wear OS. This change is happening on June 10 to enhance security, as older Android versions do not receive security updates. Users on Android Nougat and Oreo will be affected, as these versions are below the new requirement. Currently, Google Wallet support page lists Android 7.0 as the requirement, but this will soon be updated to reflect the new minimum OS version. At the launch of Google Wallet in 2022, Android 5.0 was the requirement, showing how the minimum OS version has evolved over time. For Wear OS, version 2 was initially based on Android 8.0 Oreo but later updated to Android 9.0 Pie. Google Wallet/Pay relies on Google Play services, and the last time Google ended support for an older version was in August 2023 for Android 4.4 KitKat. This change aims to keep Wallet features secure, such as tap to pay transactions, by ensuring devices can receive necessary security updates. Stay updated to meet the new OS version requirements for Google Wallet on your Android device and Wear OS smartwatch. Win Up To 93% Of Your Trades With The World's #1 Most Profitable Trading Indicators [ad_2] 1. What does it mean that Google Wallet is dropping support for old Android versions? It means that Google Wallet will no longer work on older Android operating systems. 2. Will my Android phone still be able to use Google Wallet? If your phone is running an older version of Android, you may need to update your operating system to continue using Google Wallet. 3. Why is Google Wallet dropping support for old Android versions? Google is likely discontinuing support for older Android versions to focus on improving security and compatibility with newer devices. 4. Can I still use Google Wallet on my Wear OS smartwatch? If your Wear OS smartwatch is running an older version of the operating system, Google Wallet may no longer be supported. 5. What can I do if my device is no longer supported by Google Wallet? You may need to consider upgrading your device to a newer model that is compatible with the latest versions of Android and Wear OS to continue using Google Wallet. Win Up To 93% Of Your Trades With The World's #1 Most Profitable Trading Indicators [ad_1] Win Up To 93% Of Your Trades With The World's #1 Most Profitable Trading Indicators Claim Airdrop now Searching FREE Airdrops 20 seconds Sorry There is No FREE Airdrops Available now. Please visit Later function claimAirdrop() document.getElementById('claim-button').style.display = 'none'; document.getElementById('timer-container').style.display = 'block'; let countdownTimer = 20;
const countdownInterval = setInterval(function() document.getElementById('countdown').textContent = countdownTimer; countdownTimer--; if (countdownTimer < 0) clearInterval(countdownInterval); document.getElementById('timer-container').style.display = 'none'; document.getElementById('sorry-button').style.display = 'block'; , 1000);
0 notes
Text
Google Calendar app stops support for older android versions
Google, a multinational technology company, is dropping support for its Calendar app on specific devices, effective from December 2023. This is a significant update for a majority of Android users who have long favored Google’s collection of apps over the default ones. The preference arises from the convenience of having Google apps pre-installed on all Android devices, ensuring smoother data transfers regardless of the device’s manufacturer.
However, with the coming discontinuation of the Google Calendar App for selected users, adjustments may be necessary before the change comes into effect. Despite this news, it’s essential not to panic, as the situation might not be as concerning as it initially sounds.
Which smartphones will no longer support the Calendar App?
The smartphones operating on Android 7.1 or older versions will no longer be able to use the Google Calendar app. The Android 7.1, known as Android Nougat, made its debut approximately 7 years ago in 2016. To put it in context, by December 2022, only 1.6 percent of Android devices were still running on Android 7.1.
To Read More Click here...
#tech#tech news#google#calendar#calendar app#new feature#new technology#smartphones#android version#old version
0 notes
Text
How to Fix BlueStacks Problems
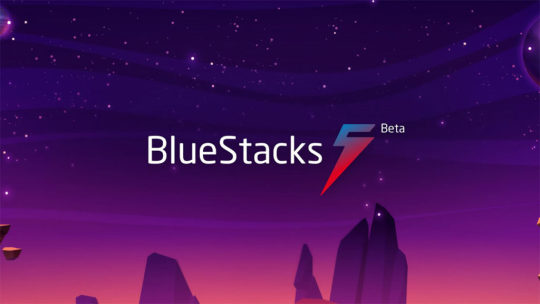
Error 1: Incompatible Windows Settings Error Message
While using the Android 11 (Beta) or Nougat (32-bit) versions of BlueStacks 5, you will get the “incompatible Windows settings”pop-up message. Also, you can get an error message that reads; your Operating System is not supporting Nougat 32-bit/Android 11 (Beta) when creating a new Instance. This happens on the Windows system with Hyper-V, which has enabled Microsoft’s hardware visualization product.
Solutions to Fix the Issue
The first method is to utilize a different version of the BlueStacks emulator. Move to the official BlueStacks download page and hit the Download a specific version tab. Choose either Nougat 64-bit or Pie 64-bit; these versions support Hyper-V.
If you wish to use the latest version of Android (Android 11 Beta), you must disable Hyper-V on the system. Launch the Control Panel, hit the Programs tab, and pick Turn Windows features on or off. On the menu, untick Hyper-V, Windows Hypervisor Platform, Virtual Machine Platform, Windows Sandbox, and Windows Subsystem for Linux. You should restart the PC. Launch BlueStack to check if it works.
Sometimes, users might also need to disable Memory Integrity. Move to the Setting tab, choose Privacy & Security> Windows security, and tap the Open Windows security button. Next, navigate to Device Security, hit the Core isolation details tab, and turn off Memory Integrity. Note that this service helps stop attacks via malicious code, so turn off this service at your own risk. If you do not wish to take a chance, choosing a BlueStacks version compatible with Hyper-V is best.
A quicker method to turn off Hyper-V on your device is through the Command Prompt. Write “cmd” in the search box and tap the Run as administrator button in the menu. Then write “bcdedit /set hypervisorlaunchtype off.”
BlueStacks emulator also eases the procedure by offering a .exe file that users can download and use to disable Hyper-V.
Error 2: Device isn’t Compatible with this Device Message When Installing Apps
Sometimes, users may get a “device is not compatible with this device” message while downloading apps via the Play Store in BlueStacks.
Solutions to Solve the Error
The best method to solve this issue is to change the device profile. In the BlueStacks emulator, launch the Settings menu under Predefined profile, move to Device, and select another device from the list. You can try different options until you get a device profile where you do not see the incompatibility error.
Also, you can clear the Google app data to solve the problem. Launch the System apps on the home screen and hit Settings (note: these are Android settings). Hit the Apps tab and launch the Play Store. Tap the Storage button and choose the Clear app data option. After confirming the selection, you can install the problematic app.
Error 3: Installation Failed or BlueStacks not Opening Error
Users may get error codes when installing or running a game on BlueStacks or launching the app. A few users also encounter a problem when installing BlueStacks.
Steps to Fix the Error
If you have issues downloading or launching BlueStacks, confirm that your computer fulfills the lowest requirements of the app. This includes an Intel or AMD processor, Windows 7 or higher, 5GB of free storage, 4GB of RAM, updated graphics drivers, and computer administrator access. Of course, the lowest requirements might not provide the best experience. BlueStacks suggests a computer with Windows 10 or higher, an Intel or AMD multi-core processor with a one-thread benchmark score of more than 1000, SSD storage, a Broadband Internet connection, and 8GB of RAM.
Confirm that you have enabled Virtualization on your computer. A straightforward method to check is by utilizing the Task Manager. Write Task Manager in the search box, or hit the Ctrl + Shift + Esc keys to open it. Move to the Performance tab, and you will see Virtualization: Enabled. If you have disabled it, you must enable virtualization to utilize BlueStacks. The procedure relies on your computer manufacturer.
If you cannot open BlueStacks, dedicate more RAM to the app and CPU cores. Launch the BlueStacks Multi-instance Manager and hit the Settings tab. Navigate to the Performance tab and choose High (4 cores) under the CPU allocation tab and High (4GB) under the Memory allocation tab. BlueStacks suggests the settings for the graphic-intensive games. If users can open BlueStacks but have difficulty launching a game, they can switch the allocation within the app. Launch the BlueStacks setting, move to the Performance tab, and select these settings. Also, you can pick the Custom option and allocate more RAM and cores, but confirm that you do not allow all the RAM and CPU cores to BlueStacks. Also, choose the High-Performance option from the performance mode list. Hit the Save Changes tab and relaunch the app.
The anti-virus program of your device can also interfere and create installation issues with BlueStacks not launching.
Error 4: Error 2318 When Uninstalling BlueStacks
A few users obtain an error message (error 2318) when uninstalling BlueStacks. This issue generally pops up due to corrupted registry keys.
Solutions to Resolve the Issue
BlueStacks provides a dedicated Uninstaller program you will get in the installation folder. It may be better to utilize this program to uninstall BlueStacks instead of doing this via the settings menu on Windows.
The Windows Installer program may be a problem, but users can restart it. Write “cmd” in the search box to launch Command Prompt and hit Run as administrator from the menu. In Command Prompt, write net stop msiserver to stop Windows Installer, then write net start msiserver to reboot the service. After this, try uninstalling BlueStacks like other Windows apps and check if it has fixed the issue.
If the issue is due to corrupted registry keys, users can remove them. Launch the Registry Editor (write reg in the search box). You may need to backup the registry to avoid the problems. Choose the Files options and hit the Export tab in the toolbar. Give the name of your backup file and choose the All option in the Export Range box. After this, hit Ctrl + F to launch the search window and write bluestacks. Delete every visible BlueStacks registry key.
Error 5: Hardware Decoding isn’t Accessible on BlueStacks
While utilizing hardware decoding, the GPU of the computer is essential to provide compressed textures and typically offers a better gaming experience. However, some users encounter the grayed-out hardware decoding option and are unavailable or do not utilize the dedicated GPU even when chosen.
Remedies to Fix the Issue
This could be an issue with hardware compatibility. Users of AMD GPUs report issues when using hardware decoding, while users of NVIDIA GPUs do not face this issue as much. Contact BlueStacks customer support to ensure whether the dedicated GPU will permit hardware decoding.
Settings issues can also be why the hardware decoding is unavailable.
Confirm that you have set up all for BlueStacks to utilize your dedicated GPU. Move to the BlueStacks settings, choose Graphics > GPU in use, and turn on Prefer dedicated GPU. Once you relaunch BlueStacks, you will see your dedicated GPU in this section.
Also, you can change settings via Windows. Look for Graphics settings in the search box or hit Settings > System > Display > Graphics and choose the Browse option under the Graphics performance preference tab. In the location search section, look for the folder where you have installed BlueStacks, choose HD-player.exe, and hit Add. When added, select BlueStacks on the menu and tap Options. Choose High Performance (with a dedicated GPU) and save the setting.
Hardware decoding is not accessible with DirectX. Move to the BlueStacks settings tab, hit Graphics > GPU renderer, and choose the OpenGL option. Select the Hardware decoding option from the ASTC textures menu on the Graphic setting screen. If your dedicated GPU is incompatible, you will get a “Hardware decoding isn’t available” error pop-up in this section.
Error 6: Google Play Store Login Problems
Users encounter some problems when logging into the Google Play Store on BlueStacks. While a few login errors have particular solutions, the best way to solve this issue is to clear the app cache. Launch the System Apps folder in BlueStacks, move to the Settings tab, tap Apps > Play Store > Storage, and hit Clear cache.
Solutions
Having a problem on the loading screen when logging in or a ” Could not sign-in error: The anti-virus program in your device may interfere with BlueStacks running properly. Configure the program utilizing the right settings.
Black/white login screen: This occurs when your graphics setting on BlueStacks does not match the system specifications. Navigate to the BlueStacks settings tab, choose the Graphics option, and change settings such as Graphics engine mode, interface renderer, and Performance mode to other options. Reboot BlueStacks and check if the issue goes away.
“Authentication required/Validate it’s you” issue: If you get this issue, clear the Google Play app cache and delete the Google account before signing in again. To delete the Google account, move to the System app tab and hit Settings > Account. Choose your account and tap the Remove Account option. Return to the previous screen, tap Add account, and specify the login credentials.
“This device is not Play Protected” issue:This issue generally shows if you use a custom device profile. Navigate to BlueStacks settings > Phone, move to Select a predefined profile, and choose any of the phones from the list.
How to sign in without a Gmail account: You can access BlueStacks with a non-Gmail account but must open a Google account connected to that email address. Move to the Google website and hit the Sign-in tab at the top. Tap the Create Account button. Specify your information and choose the Use currency email account instead option. Provide the non-Gmail address and follow the validation procedure. After setting up the account, you can sign in to BlueStacks with this email account.
Error 7: BlueStacks is Slow
BlueStacks might be resource-heavy, based on what applications you are using, and there are situations when you find it laggy or slow.
Tips to Solve the Problem
Users can enhance the performance of BlueStacks by allocating more RAM and CPU cores to the app. Hit BlueStacks settings > Performance and select High (4 cores) and High (4GB). Also, you can choose Custom to select more RAM and cores, but do not allocate all RAM and CPU cores to BlueStacks. Confirm that you have set High performance in the Performance mode list.
Anti-virus programs can also create performance issues.
Ensure you have enabled Virtualization to get the best experience.
Also, you can enhance performance by empty RAM. Launch Task Manager by hitting Ctrl + Shift + Esc and close the idle or unwanted apps in the background. Apps such as Google Chrome are a notable issue in this regard. Choose the app you need to close and hit the End task button.
Error 8: Can’t Install APK Issue
You can get a “Can’t install APK” error message if the app or game you are installing is not compatible with the Android version of BlueStacks you are using. It will happen if you use the older versions, such as Android Pie 32-bit.
Tricks to Fix the Error
The way to play a game or utilize an app that is not compatible is by opening a new instance with the latest version of Android. Launch the Multi-instance Manager ( a three-layer tab at the right, two above the gear icon), hit the Instance tab, and choose Fresh instance. Select the latest Android version from the available list, like Android Nougat (64-bit) or Android 11 (Beta). If you haven’t installed these, you must download a few additional files and choose settings like memory allocation, CUP allocation, performance mode, resolution, and others for this new instance. Tap Download to generate a new instance, then hit Start on the Multi-instance Manager page. Now, you must be able to install the APK with issues.
Some Common BlueStacks Problems
BlueStacks features a weekly running list of issues and bugs that it solves so that users can check to see the solution for their issues.
Advertisements
about:blank
REPORT THIS AD
Users with Mac can encounter the “System extension blocked” error. Older Macs with M1 processors, MacOS 13 Ventura, and Macs running MacOS 12 Monterey do not support BlueStacks. Users can report an error by tapping the “?” icon in the BlueStacks app window and choosing the Report a problem option. Choose the issue type, specify other information, and hit the Submit a Report button. Also, you can download the BlueStacks 5 Log Collection Tool to offer an issue log if you encounter problems with BlueStacks not downloading or launching.
Source:https://hariguide.com/how-to-fix-bluestacks-problems/
0 notes
Link
1 note
·
View note
Text
My first purchase as a working adult: getting myself a new phone because mine is 4 years old and a dumpster fire waiting to happen thanks to built in obsolescence and the fact that sometimes shit just breaks
#oh you can use my old one!#elric.txt#My dad is trying to demonize me with this new phone thing#He says#No dad. Thanks but I really want to upgrade my operating system to android 7#And the phone I'm getting has 64gb of space compared to my 16#The way Google play updates apps means I run out of space once a week#Because they can't leave things on the SD card when they do updates#So I constantly have to move it back#Plus the new phone has a bigger battery and that shiny android nougat#Time to treat myself to a much needed upgrade#Plus my dad's a total hypocrite. He bought the galaxy s8 outright#Granted he got it on sale but it was still like 400 bucks from his car accident money#The one I'm eyeing is under 200
2 notes
·
View notes
Text
Samsung Galaxy S8 and Galaxy S8 Plus at the End of the Road, Will Stop Receiving Crucial Updates
Samsung Galaxy S8 and Galaxy S8 Plus at the End of the Road, Will Stop Receiving Crucial Updates
Samsung Galaxy S8 Plus -Orchid Gray (L); Samsung Galaxy S8 – Orchid Gray (R) A report adds that other devices in the S8 series, the Samsung Galaxy S8 Active and the Samsung Galaxy S8 Lite (aka Galaxy S Light Luxury) are still listed in Samsung’s software update schedule. Samsung will reportedly stop rolling out system updates for the Samsung Galaxy S8 and the Galaxy S8 Plus, which were launched…

View On WordPress
#Android 7 Nougat#android 9 foot#Android OS#android update#one ui#Samsung Galaxy S8#samsung galaxy s8 active#Samsung Galaxy S8 Lite#samsung galaxy s8 plus#Samsung Galaxy smartphones#Samsung Galaxy Upcycling at Home#samsung one ui#Samsung phone upcycling#Samsung SmartThings App#Samsung Updates#SmartThings Labs#upcycle
0 notes
Text
Samsung Galaxy S8 and Galaxy S8 Plus at the End of the Road, Will Stop Receiving Crucial Updates
Samsung Galaxy S8 and Galaxy S8 Plus at the End of the Road, Will Stop Receiving Crucial Updates
Samsung Galaxy S8 Plus -Orchid Gray (L); Samsung Galaxy S8 – Orchid Gray (R) A report adds that other devices in the S8 series, the Samsung Galaxy S8 Active and the Samsung Galaxy S8 Lite (aka Galaxy S Light Luxury) are still listed in Samsung’s software update schedule. Samsung will reportedly stop rolling out system updates for the Samsung Galaxy S8 and the Galaxy S8 Plus, which were launched…

View On WordPress
#Android 7 Nougat#android 9 pie#Android OS#android update#Crucial#Galaxy#one ui#Receiving#Road#S8#samsung#Samsung Galaxy S8#samsung galaxy s8 active#Samsung Galaxy S8 Lite#samsung galaxy s8 plus#Samsung Galaxy smartphones#Samsung Galaxy Upcycling at Home#samsung one ui#Samsung phone upcycling#Samsung SmartThings App#Samsung Updates#SmartThings Labs#stop#upcycle#Updates
0 notes
Text
Detailed instructions for downloading and installing the Aid Android 10 update for Moto Z2 Play
Detailed instructions for downloading and installing the Aid Android 10 update for Moto Z2 Play Moto Z2 Play (also known as Motorola Z Play) was launched in June 2017 with specifications suitable for the mid -range segment. The device initially runs Android 7.1.1 Nougat and is now able to upgrade to the Adroid 10 version. If you own Moto Z2 Play and want to experience the smooth Android 10…
0 notes
Text
[How to Guide]Update OnePlus 6 OxygenOS 5.1.5 OTA (Full Rom)
[How to Guide]Update OnePlus 6 OxygenOS 5.1.5 OTA (Full Rom)
The latest OxygenOS 5.1.5 has now available for OnePlus 6 smartphone. The update has rolled out via OTA (over-the-air). In recent time the company released latest OxygenOS 5.1.5 for OnePlus 6 device. So if you are the user of OnePlus 6 and want to update our smartphone to latest OxygenOS 5.1.5 ROM. Then we are here to share you the full method to update OnePlus 6 OxygenOS 5.1.5 ROM. Follow and…
View On WordPress
#Android#Android Nougat 7.0#Android Oreo#Download#Guide#How to#OnePlus#Oneplus 6#Stock ROM#Update#Updates#Updates firmware#Upgrade
1 note
·
View note
Text
Harga BlackBerry KEYone di Indonesia
spesifikasiharga.net – Sobat sekalian BlackBerry secara resmi memboyong BlackBerry KEYone ke pasar indonesia sob … setelah cukup sukses membawa Blackberry Aurora … PT BB Merah Putih sekalu pemegang merek BlacKBerry di indonesi kembalai memboyong smartphone android dengan kode nama BlackBerry KEYone …
Nah untuk pasar indonesia smartphone yang menawarkan desian super elegan dan memiliki spesifikasi…
View On WordPress
#12MP#4.5 Inch#4G LTE#8MP Kamera Depan#Android#Android Nougat#Blackberry Android#BlackBerry KEYone#Bodi Metal#Dual Kamera#Finger Print Sensor#Fitur BlackBerry KEYone#Harga BlackBerry Keyone#Keunggulan BlackBerry KEYone#News Update#Review BlackBerry Keyone#Selfie Phone#Spesifikasi BlackBerry Keyone
2 notes
·
View notes
Link
#ProBlogBooster#Android#AndroidTips#SpeedupMobile#MobileApps#Technology#Nougat#AndroidDevice#Updated#Solution#Samsung#Rooting#Quicktips
0 notes
Text
What's up, you sweet nutty nougats!
I...need some help. My current phone has been throwing a tantrum as of late and, just recently, didn't want certain (some of which were very important) apps to not function anymore. In addition, my screen is cracked from my clumsiness. So...yeah.
Things to keep in mind:
I'm not asking for a new phone.
I just need help on my search for one.
With me so far? Awesome sauce.
Now, there are specific parameters in play here. These are not negotiable. They are:
Under $50 (USD)
Brand New (No refurbished, pre-owned, etc.) (Open Box is OK)
Android OS (Operating System)
Touchscreen (obviously)
64+ of GB (space)
Free shipping
These are negotiable:
Black
Medium (or large) sized screen
Good back camera quality
If you can help, then cool beans! If not, thats ok too. You can always share this post to others.
Updates will be made when I can. I'll also be tagging some peeps as well.
I'll start with...
@thehugwizard @tinalbion @bisexual-horror-fan @horrorslashergirl @mattanimaniac @franks-mixtape @the-hellshire-outlaw @sushi-legion @lacetulle @the-inquisitive-journalist @jeckyl-in-the-fog @jesseskullcromeans @asa-emory-the-collector @littlemissspringwood @little-lily-w
26 notes
·
View notes